
 An official website of the United States Government

Identity Verification Guide
Learn how HUD verifies your identity through the Socure identity verification process, including the driver's license/ID or passport and selfie steps required to access HUD Secure Systems.
Before You Begin
To complete identity verification successfully, you will need:
Personal Information
- Full legal first name
- Full legal last name
- Date of birth
- Social Security Number (SSN)
- Personal mobile phone number
- Current residential address
Government-Issued Identification
Accepted forms of identification include:
- State Driver's License
- State Identification Card
- U.S. Passport
- Other approved U.S. government-issued photo identification
Device Requirements
You may complete verification using:
- A smartphone
- A tablet
Note: For the best experience, a smartphone with a camera is recommended.
Starting the Socure Verification
Sign in to HUD Secure Systems and enter your personal information to begin identity verification.
-
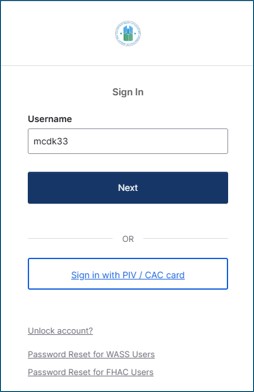
On the HUD Secure Systems Sign In page, enter your assigned user ID in the "Username" field and select "Next".
-
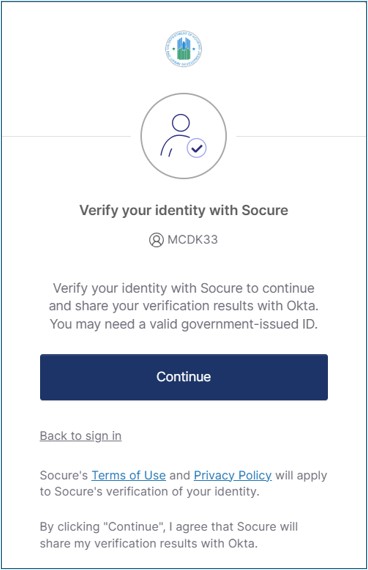
The Socure screen, "Verify your identity with Socure," is displayed. Select "Continue".
-
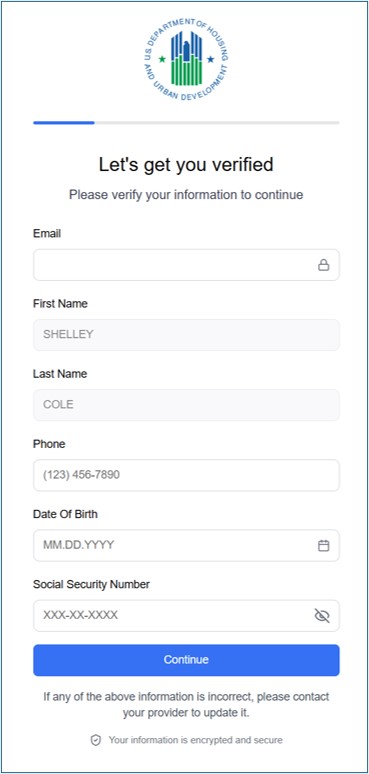
The "Let's get you verified" screen is displayed. You will be asked to provide the following information, then select "Continue":
-
Email Address: Enter your current email address.
- Use an email address that you can access.
- Double-check spelling before continuing.
- If you are a new employee, it may be necessary to enter a personal email address for greater success at verification.
-
First Name: Enter your complete legal first name exactly as it appears on your government-issued identification.
- Correct: Michael, Jennifer
- Avoid: Mike, Jen, Initials Only, Nicknames, etc.
-
Last Name: Enter your complete legal last name exactly as it appears on your government-issued identification.
- Correct: Johnson, Garcia-Smith
- Avoid: Nicknames, Abbreviations
-
Phone Number: Enter your personal U.S. mobile phone number.
- Must be a U.S. mobile number
- Must be your personal phone number
- Must be capable of receiving text messages
- Avoid work phone numbers, shared family phones, business phone numbers, international phone numbers, and VoIP services when possible
- Date of Birth: Enter your complete date of birth (Format: MM/DD/YYYY — Example: 04/15/1985).
- Social Security Number: Enter your complete 9-digit Social Security Number (Example: 123-45-6789). Enter all nine digits, use your own SSN, and verify accuracy before continuing.
Your date of birth must match official records. Do not enter partial Social Security Numbers.
-
Email Address: Enter your current email address.
-
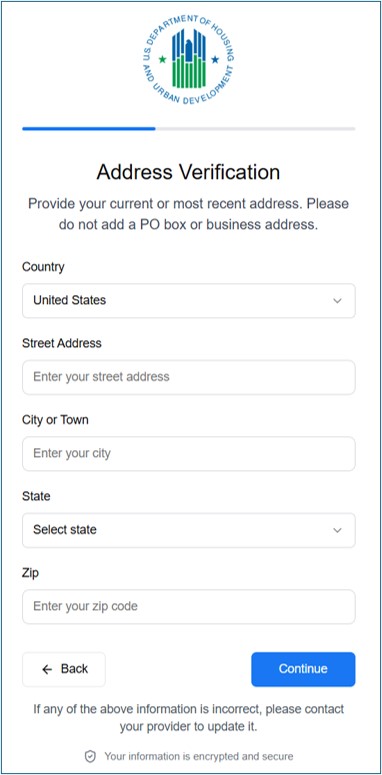
The Address Verification screen is displayed. You will be asked to provide your current or most recent residential address, then select "Continue":
-
Address Verification: You will be asked to provide your current or most recent residential address.
- Street Address
- City
- State
- ZIP Code
- ZIP Code: Enter a valid 5-digit ZIP code associated with your residential address (Example: 20001).
- Accuracy: Enter your address exactly as it is used for official records whenever possible.
Use your residential address. Do not enter P.O. Boxes, business addresses, or temporary mailing locations.
-
Address Verification: You will be asked to provide your current or most recent residential address.
-
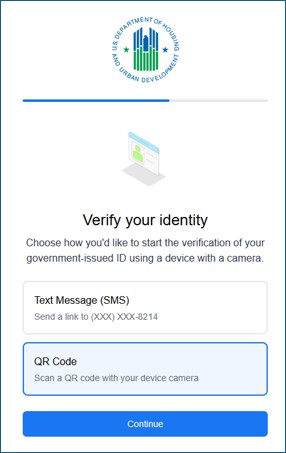
The "Verify your Identity" screen is displayed. Choose to proceed using "Text Message (SMS)" or "QR Code".
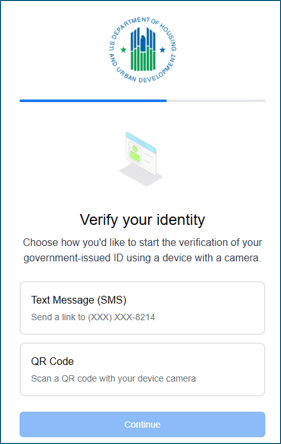
Depending on which option you choose above, continue to Verifying via Text Message (SMS) or Verifying via QR Code below.
Verifying via Text Message (SMS)
Follow these steps if you selected "Text Message (SMS)" on the Verify your Identity screen.
-
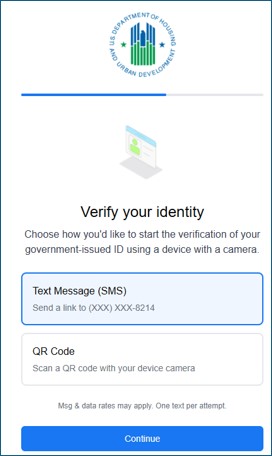
Once "Text Message (SMS)" is selected, the screen displays with your selection highlighted. Select "Continue".
-
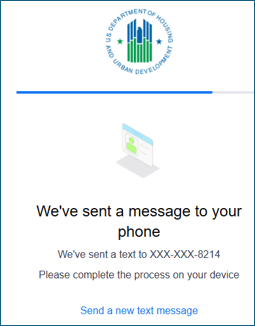
The "We've sent a message to your phone" page is displayed on your computer.
-
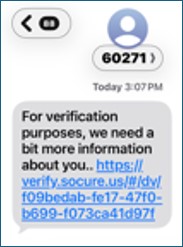
Open the text message you receive on your phone and tap the verification link.
-
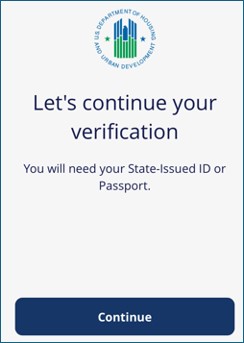
The "Let's continue your verification" screen is displayed on your smartphone. Select "Continue".
Verifying via QR Code
Follow these steps if you selected "QR Code" on the Verify your Identity screen.
-
Once "QR Code" is selected, the screen displays with your selection highlighted. Select "Continue".
-
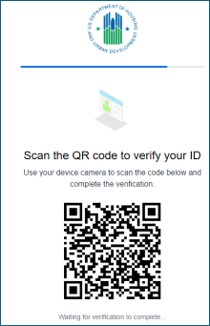
The "Scan the QR code to verify your ID" page is displayed. Aim your smartphone's camera at the QR code on the computer screen and tap to open the link in your smartphone's browser when prompted.
-
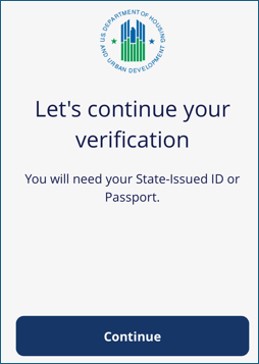
The "Let's continue your verification" screen is displayed on your smartphone. Select "Continue".
Consent & Choosing Your ID Type
Once your device is verified, you'll be asked to consent to the identity check and choose which form of ID you'll use.
-
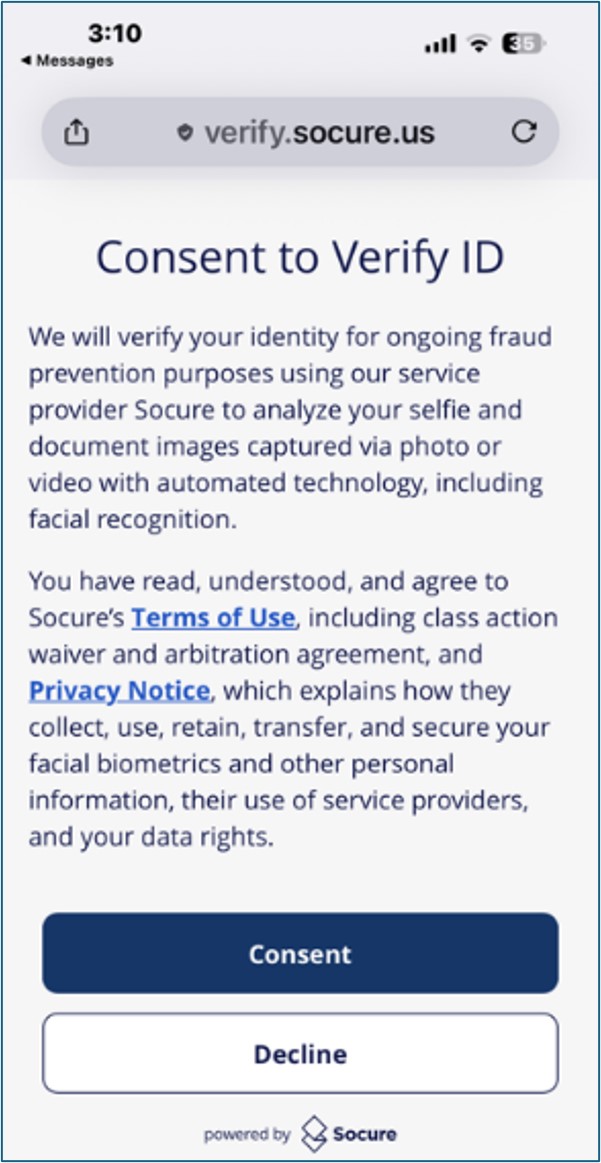
The "Consent to Verify ID" screen is displayed on your smartphone. Read the conditions and select "Consent".
-
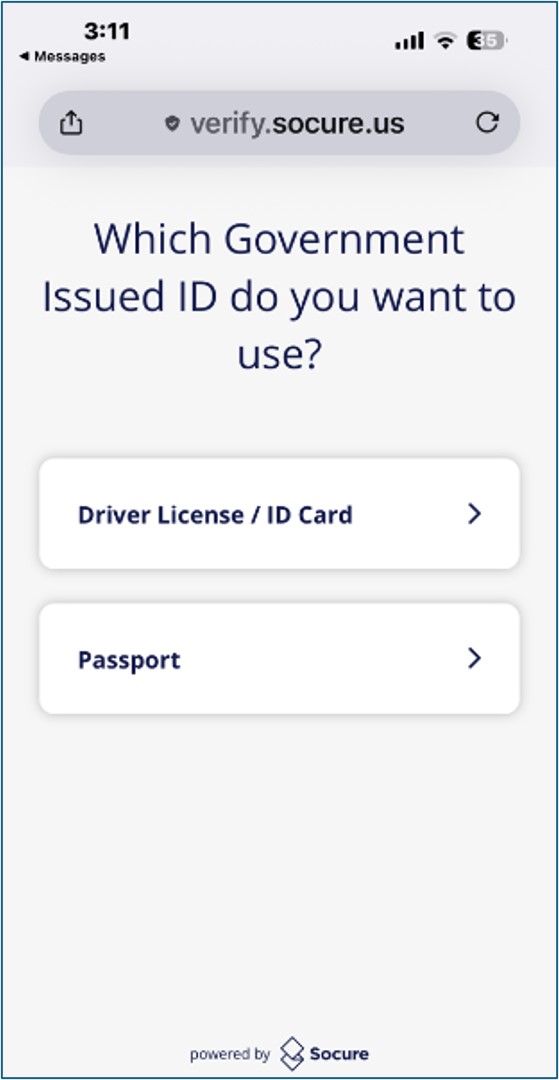
The "Which Government Issued ID do you want to use?" screen is displayed. Select either "Driver License / ID Card" or "Passport".
-
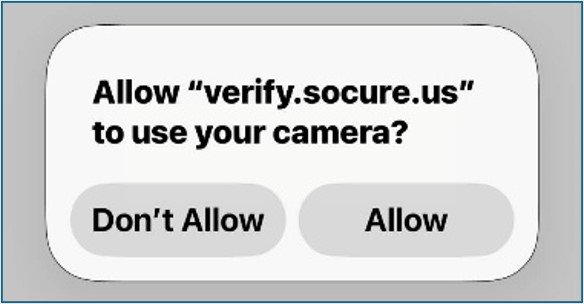
A pop-up window is displayed asking for permission to access your camera. Select "Allow" to allow verify.socure.us to use the camera.
-
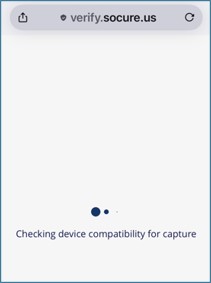
Your smartphone is checked for compatibility to begin capturing your ID.
Depending on which ID you choose above, continue to Verifying with a Driver's License / ID Card or Verifying with a Passport below.
Verifying with a Driver's License / ID Card
Follow these steps if you selected "Driver License / ID Card" on the previous screen. Make sure you have your driver's license or ID card readily available.
-
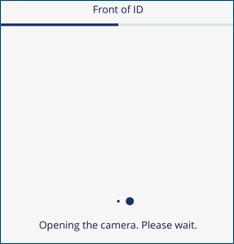
Once compatibility is confirmed, your smartphone's camera opens.
-
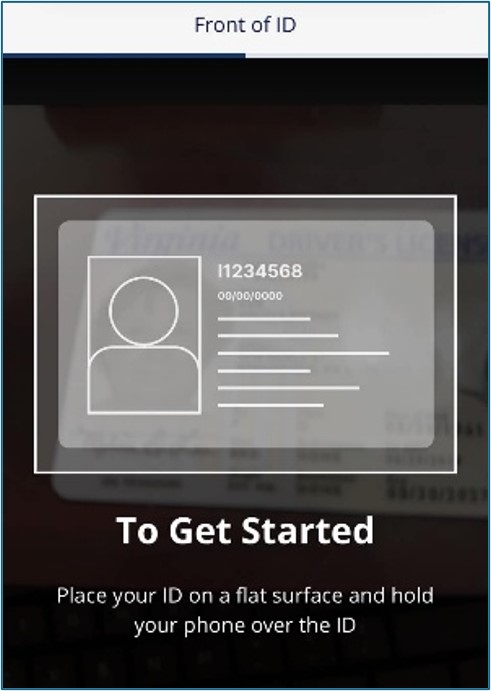
Place your ID on a flat surface and hold your phone over it. Your smartphone will attempt to scan the ID automatically.
-
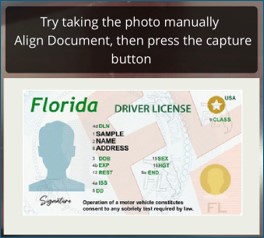
If no photo is taken within a short time, you'll be prompted to take the photo manually — align the document, then press the capture button.
-
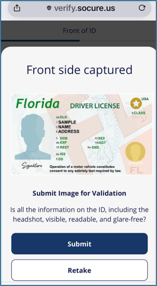
Review the captured front of your ID and select "Submit". If you're not satisfied with the image, select "Retake" and repeat.
-
Once submitted, the image is validated by Socure.
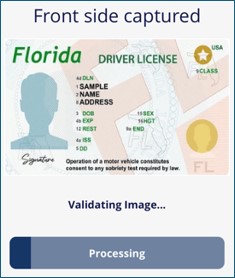
-
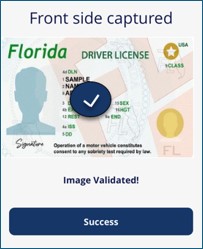
The front of your ID is successfully validated.
-
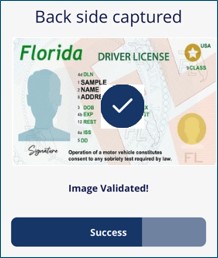
Repeat the steps above to capture and validate the back side of your driver's license or ID card.
Verifying with a Passport
Follow these steps if you selected "Passport" on the previous screen. Make sure you have your passport readily available.
-
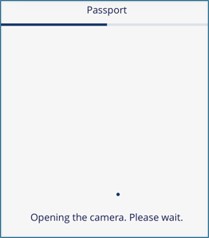
Once compatibility is confirmed, your smartphone's camera opens.
-
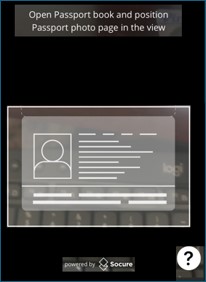
Open your passport book and position the passport photo page in view, aligning it with the displayed image.
-
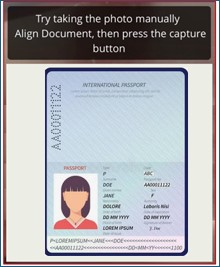
If no photo is taken automatically within a short time, you'll be prompted to take the photo manually — align the document, then press the capture button.
-
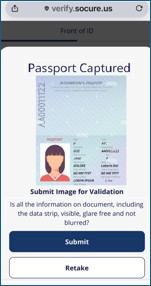
Review the captured passport photo page and select "Submit". If you're not satisfied with the image, select "Retake" and repeat.
-
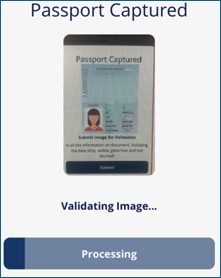
Once submitted, the image is validated by Socure.
-
Your passport is successfully validated.
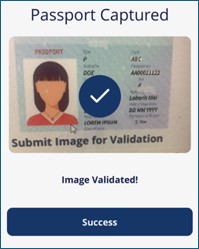
Unlike a driver's license or ID card, a passport does not require a back-side capture.
Taking Your Selfie & Completing Verification
The final step is to take a photo of yourself so Socure can match your face to your ID.
-
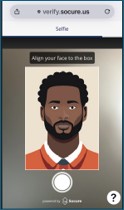
Use your smartphone's camera to take a picture of yourself (a selfie). Align your face to the box as prompted.
-
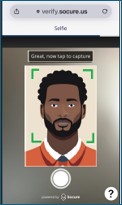
Once your face is aligned, tap to capture the photo.
-
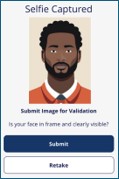
Review your selfie and select "Submit" if you're satisfied with the photo, or "Retake" to take another.
-
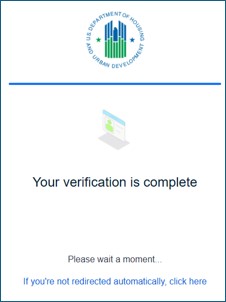
When the Socure identity verification process is successfully completed, the "Your verification is complete" screen is displayed.
-
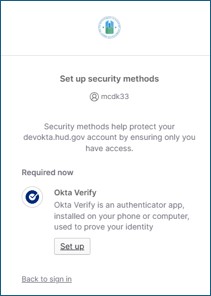
If you have not already set up your multifactor authenticator (MFA), you will be prompted to do so upon completion of the Socure validation. Select "Set up" next to Okta Verify to continue.
For detailed instructions on setting up your multifactor authenticator, please refer to the MFA Guide.
If you need help, please contact HUD Secure Systems Support Services:
Phone: 1-888-245-4860
Email: REAC_TAC@hud.gov